We have begun sunsetting operations. All sales are now final. Click to learn more
Steps to Carry Out Proper Maintenance of AR-15 Pt 1
After bringing home your new AR-15, you may have headed out to try a few rounds at the range. Once you return home, your first main long-term challenge becomes obvious: cleaning the weapon. While it may look confusing at first, this is a fairly easy task which you should be able to complete comfortably. Below is a discussion on how to properly clean your AR-15.
Get the Right Set of Tools
If you own other guns, you might already have the tools you need for cleaning this particular firearm. In case you are a new owner, you can either buy a pre-made cleaning kit or make your own. The former approach is fine if you are looking for normal cleaning efficiency. However, if you use your gun regularly, you should build a kit that meets your regular needs.
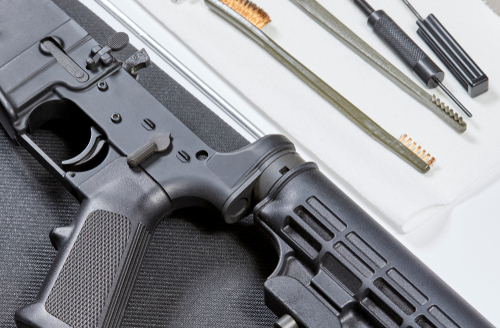
- Buying a Pre-Made Kit: This is a great option which would cover all your basic necessities, and there are several good options available. One of the disadvantages to buying a pre-made kit is that you might get a few extra brushes and bore snakes that you do not need.
- Building Your Own AR-15 Cleaning Kit: The experience of cleaning a gun will definitely differ for each person. This means it is nice to have a customized cleaning kit that will cater to your specific needs and methods. For this, you can compile weapon accessories from various pre-made kits and add them up to make your own kit.
After this step, you will require a cleaning mat to carefully place all the components individually in the open.
Clear the Firearm
First, open the cleaning mat and put on the gloves. The latter protects your skin from chemicals found in the various cleaning fluid. Then, remove all the ammo from the gun and place it outside the room. This eliminates the chance of an accident.
Remove the magazine and set it aside. After this, lock the bolt to the rear and inspect the chamber visually. Remove any remaining ammunition, release the bolt, and put the weapon on safe.
Separate the Upper Receiver from the Lower Receiver
By pushing the take-down pins, separate the two halves of the gun. Some pins can be pushed out with a finger, but others may require a punch. Make sure that you do not scratch the finish of the weapon while performing this step. Using a nylon pouch is advisable in order to remove the pins without scratching.